Sourdough Bread Recipe

8AB15F32-67F4-4418-AA64-C9CD1EF0B7FBF231088D-4DFF-49E8-B419-A3C6045B2F0ADB4E63B9-9F5C-4736-81D6-D930EFFB4CE6


Step 1:  Make your starter

IMG_2410IMG_2411IMG_2412

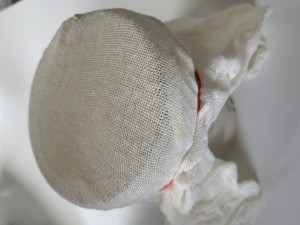
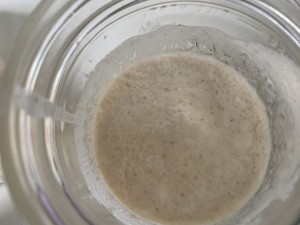
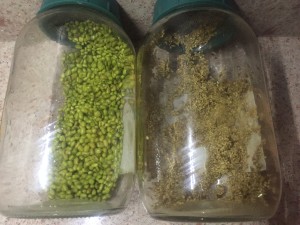
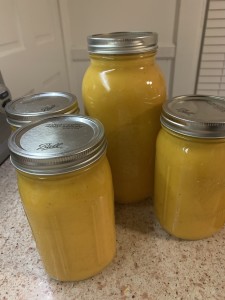
In order to make sourdough, you first of all need to make a starter (see pictures above). For the starter you need a glass jar, and piece of cloth and an elastic band.  Into the jar you put about 1/4 cup flour and 1/4 cup water and stir vigorously.  From here you will cover with the cloth secured to the jar with an elastic band, and leave on the counter top.  Each day you will add about 1 tbs flour and 1 tbs water and stir vigorously.  Eventually after 5-7 days you should start to see bubbles on the top (see middle picture above).  Once this happens your starter is ready for use.  When my first starter was ready, I woke up in the morning to find it bubbled over the top of the jar and onto the counter top!  A sticky mess, but I was delighted it was suddenly so active and obviously ready to be used.

Step 2:  Make your proof

5609AFD9-143E-4B45-A98D-5D3F9033FB2A

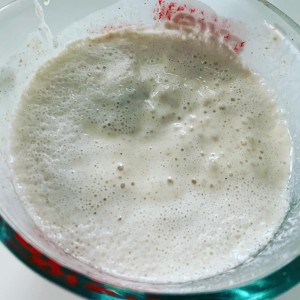
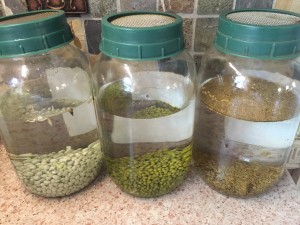
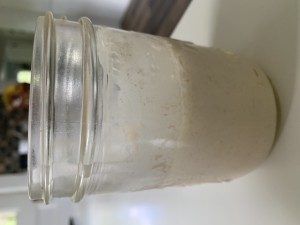
In order to make your proof, you are going to take some of your starter (maybe half depending on how much you have) and put it in another jar or I use a pyrex jug for this step.  Add 3/4 cup flour and 3/4 cup water to the starter and stir vigorously.  Cover with a cloth and leave for 6-12 hours until it is bubbly – see picture.


Step 3:  Making the dough

Finally now yo5E1B057D-892C-4E3F-8E1A-0D972BBF98EDC3A4F7B2-621D-4107-A194-A5ACA28E3F7B
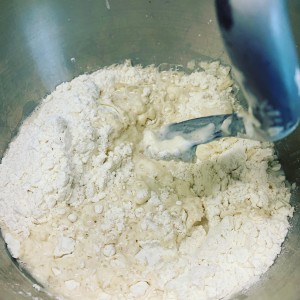
u are ready to make your dough.  Plan ahead because obviously this whole thing takes a minute!  Add to a stand mixer 4-4.5 cups flour, 2 cups of water, 1 tbs salt and all of your proof mixture.  The mixture should be on the wet side as you can always add flour but once it’s mixed it’s very difficult to add moisture.  Your dough needs to be very sticky forming super soft dough.  Once you have used the dough hook to knead it for 15-25 minutes, remove it from the mixer and put into a cast iron dutch oven – preferably just plain cast iron.  Cover in a greased piece of cling wrap and leave to rise for 6-8 hours or overnight.

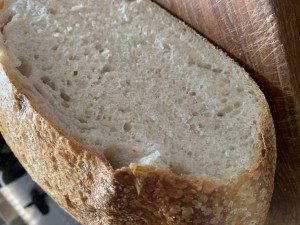
Step 4:  Punch it down and re-rise, then bake

07374ABC-C54E-43A2-852B-4398FBA46C0F

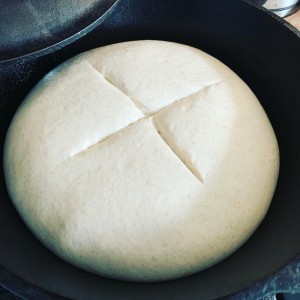
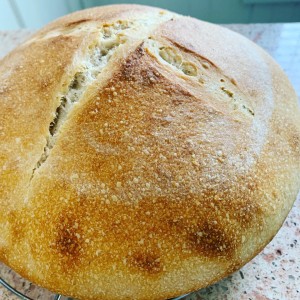
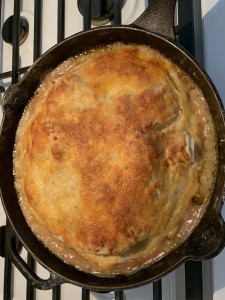
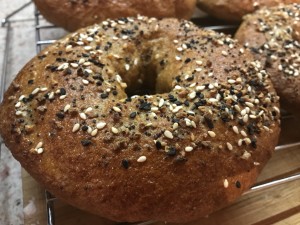
Punch your dough down (it should have doubled), and re-shape.  Leave for a further hour or two until you see it has begun to rise again.  With a very sharp knife cut a cross in the top.  Put the lid of the dutch oven on, and bake in a preheated oven at 475 degrees for 10 minutes.  Reduce to 450 degrees and continue cooking with the lid on for 10 more minutes.  Remove the lid and bake 20-25 more minutes.  The bread will be dark brown and well risen.  The loaf pictured center and right was made with organic wheat flour with wheat germ.  The picture on the left below was made with my home ground wheat berry whole wheat flour together with the organic wheat flour, or it can be made with all whole wheat.


Enchilata Casserole

IMG_1047

Ingredients:

Home made Tortilla Recipe:

  • 1 cups flour
  • 1/4 tsp baking powder
  • 1/2 tsp salt
  • 1/4 cup oil
  • 3/4 cup warm water

To make tortillas mix flour, baking powder and salt and then add the oil and water and mix into a soft dough.  Knead on the counter for a couple of minutes using some extra flour, then cover in plastic wrap and let rest for 10 minutes.  Heat a cast iron skillet for 5-10 minutes.  Divide dough into 4, and roll out to large think circle.  Put on skillet until you see bubbles – should be 30 seconds-1 minute a side.  Then place on cooling rack while you continue to cook the other three.  Set aside.

Filling:

  • 3 large cooked chicken breasts cubed or shredded
  • 1 cup shredded cheese
  • 1 large onion
  • 1 can black beans
  • 1 large onion sautéed in 2 tablespoons oil

Sauce:

  • 2 cups chicken broth
  • 2 tablespoons better than bullion chicken
  • 1/3 cup flour
  • 1 cup sour cream or heavy cream
  • Red chilli pepper flakes

To make the sauce heat the chicken broth with red chili flakes and bullion mixed in.  In another bowl mix 1/3 cup flour with cream or sour cream until smooth and gradually add chicken broth.  Once combined heat to thicken.

To assemble casserole place one tortilla in the bottom of the cast iron skillet, cover with shredded chicken, 1/3 of sautéed onion, 1/3 can of black beans, and sprinkle with 1/4 cup grated Mexican cheese.  Drizzle a little sauce over the top.  Place second tortilla on the top and repeat the process twice more.  Top with remaining sauce (which should be quite a bit), and generously with shredded cheese.

Bake at 375 degrees F for 20 minutes.  Cut into wedges and serve with sliced avocado and salsa.


Kombucha

IMG_1081


Kombucha is a fermented tea drink that is packed with probiotics and great for your stomach.  It’s expensive to buy but easy to make at home.

To start you need to grow or acquire a SCOBY (Symbiotic Colony of Bacteria and Yeast).  I have a few available if anyone is interested, or you can grow one by buying a bottle of Kombucha from the store and do the following:


  • Pour the raw kombucha and the cooled tea into a glass jar.
  • Cover the jar with a tight-weave dish towel or a paper coffee filter. …
  • Ferment the tea in a warm spot, 68-85ºF, out of direct sunlight, for about 7 days.

Once you have your SCOBY, you need a large glass jar and a few tea bags.  Brew a strong batch of tea and add about a cup of white sugar per quart jar of tea.  Once the tea has cooled, remove the tea bags and add your SCOBY with some of it’s juices.  Cover tightly with a cloth, and seal with an elastic band,  Leave in a warm dark place for about 2 weeks.  After 2 weeks  you can remove tea from jar separating SCOBY to use in the next batch, then flavor kombucha as you wish.  I use Trader Joe’s organic peach juice, but you can also use lemon juice and ginger or any number of other flavors.

Once you have flavored the batch, pour into glass bottles or jars and seal tightly.  Place your flavored kombucha jars or bottles on a window sill where it gets some sunlight, and let ferment for a second time for 3-5 days.  Be careful when you open your bottles or jars, as it will be fizzy.  I put mine in the fridge after a week on the window sill to ensure it does not explode when I open it!

Nut Roast

  • 1 Cup chopped nuts of choice (how finely you grind them is up to you)
  • 1 Cup bread crumbs
  • 1 Medium onion
  • 1 Cup diced celery
  • 1 Cup finely chopped carrot
  • 1 Large can diced tomatoes
  • 1/4 Cup olive oil
  • 1-2 Cups marinara sauce of your choice
  • 1 egg
  • 1/2-1 Cup cheddar cheese
  • Salt and pepper to taste

Heat olive oil in skillet and sauté onion, celery and carrot with salt and pepper until tender.   Mix with the rest of the ingredients, and taste to be sure seasoning is to your liking.  Put into a loaf tin.  Bake at 350 F for 25 minutes and serve warm or cold with or without marinara sauce.

Squash Bisque with Bacon Cheddar Biscuits

Squash Bisque

4334F4B3-51AE-4329-8982-F4D2DA27E9D1_1_201_a

  • 1 32 oz container of chicken broth
  • 2 cups water
  • 2 large carrots
  • 1-2 parsnips
  • 1 large sweet potato
  • 1 onion
  • 1 tablespoons of ‘Better than Bullion’ chicken flavor
  • Salt and pepper to taste
  • Red pepper flakes to taste
  • 1/2 a small butternut squash
  • A little heavy cream to taste is optional

This soup can be easily modified to suit the vegetables you have available, you really can’t go wrong.  You can also adjust the seasoning to taste.

Put all the above ingredients into a large saucepan and bring to the boil.  Continue to boil until all vegetables are soft.  Using a hand held blender, puree all ingredients until smooth, adding heavy cream if you choose to.  Taste and add salt and pepper as needed.  You can serve with a little grated Parmesan cheese melted into the soup, or just eat it plain.  This makes approximately 10 cups of soup or 5 large servings at about 100 calories a serving.  As you see above I like to make a large batch and store in mason jars in the fridge.  It makes a great lunch and if you work, you can bring a small mason jar of soup to work and put it in the microwave to heat.

  • Chicken broth – 40 calories
  • Carrots – 60 calories
  • Parsnips – 30 calories each
  • Sweet potato – 100 calories
  • 1 onion – 64 calories
  • Bullion – 80 calories
  • Butternut squash – 2 cups 120 calories
  • 1/4 Cup heavy cream (optional) – 205 calories

Calorie count: 500-700 Calories for the whole pot.

Bacon Cheddar biscuits

9B3A39B9-39DA-4D90-A67C-525CBBE17CD3_1_201_a

  • 1/2 cup butter (or alternative fat)
  • 1 cup cheddar cheese (to your taste)
  • 1/2 cup bacon bits (optional)
  • 2 cups flour
  • 1 egg
  • 1 cup milk (or chosen alternative)
  • 1 tablespoon baking powder
  • 1/2 teaspoon salt

Mix all ingredients just until blended.  Spoon onto a baking sheet and bake in a 400 degree oven for 10-15 minutes – it makes about a dozen.  Below is the calorie breakdown for you.  If you substitute lower calorie alternates you can look them up to get a more accurate calorie count.


  • 2 cups flour – 700 calories
  • Butter/fat – 800 per half cup
  • 1 cup cheddar – 455 calories
  • 1 cup milk – between 100 and 150 depending on the milk
  • 1 egg – 70 calories
  • 1/2 cup bacon bits – 216 calories

Total calories = 2400 – 12 biscuits at 200 calories each


Whole Wheat bagel

sC0yLtBUS0ytWJ52BvwKlA

  • 3 cups whole wheat flour
  • 1 Tablespoon yeast
  • 1/2 tablespoon of salt
  • 1.5-2 cups hand hot water
  • Trader Jo’s ‘Everything but the bagel’ seed topping
  • Beaten egg or egg white

If you have a mixer then add the flour, yeast and salt to the bowl and mix.  Add water until a dough forms.  Use the dough hook or knead by hand until dough is smooth and stretchy.

I don’t usually rise the dough twice but you can leave the dough in the bowl, cover with greased cling wrap and let it double in size.  Punch the dough down and split into 10-12 equal balls.  Use your thumb to make a hole in the middle and shape bagels.  Place on a well floured board or baking sheet and cover with greased cling wrap.  Let rise until almost doubled in size.

Meanwhile boil a pot of water with a little honey and baking soda (optional)  Once pot is boiling reduce heat to a simmer, and slide one or two bagels into boiling water being careful not to break the rise.

Boil bagels for 1 minute on each side turning over carefully with a spatula.  Carefully lift out of the water shaking off excess water.  Put on greased baking sheet, brush with beaten egg, and top with ‘Everything but the bagel’ topping.  Alternately you can top with rock salt, sesame seeds, poppy seeds or seed of your choice.  Bake in a pre heated 450 degree oven for 15-20 minutes.

If you make 10 bagel, each bagel is approximately 120 calories.  If you make slightly larger bagels and only make 8 then they are 153 per bagel.  Smaller bagels have 34g carbs and 6.4g protein.  Larger have 43g carb and 8g protein.  This makes a great breakfast with almond butter and a banana sliced on top.

Enjoy!

Chocolate Pumpkin Apple Bread

57118397638__769F36A5-0CA8-4147-9768-CAB74697097E
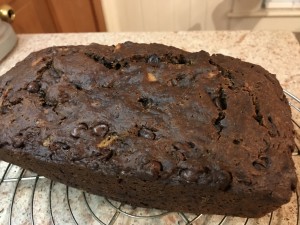
This is truly a delicious bread that can be souped up to make a great dessert by the addition of whipped cream or if you are going lower fat, add a dollop of vanilla greek yogurt.  It’s simple, fairly low fat, and you can decide how much sugar to add depending on your taste and dietary concerns.  The walnuts and chocolate chips are optional and how many you put it is also fairly fluid.

You can also swap out your fruits depending on what you have available.  Canned pumpkin is hard to come by unless it’s Thanksgiving time, so you can use mashed banana as an alternate.

Ingredients:

  • 1/2 cup coconut oil – melted
  • 1 cup pumpkin puree (can be substituted for banana or just extra apple sauce)
  • 1/2 cup apple sauce (I used my home made chunky but any will work)
  • 1/2 cup cocoa powder
  • 1 1/2 cups flour
  • 1 1/2 teaspoons baking soda
  • 1/2 teaspoon salt
  • 2 eggs
  • 2/3 cup sugar (you can use more or less depending on your preference, can also substitute with honey or agave although it may change the flavor slightly)
  • 1/2 cup chocolate chips. 1/2 cup walnuts  (can do all nuts or all chips, add more or less or not at all)
  • 2 teaspoons pure vanilla (this is also optional for flavor)

Add all ingredients to a bowl and mix until well combined.  Put into a well greased loaf pan (preferably a large one – mine is 6″x 10″ and 3″ deep which is larger than the average pan).  Alternately you can use an 8×8 baking pan.  In this case your baking time will be shorter by about 10-15 minutes.

Bake at 350F for 50 minutes to 1 hour (mine took an hour in my large loaf pan).  In an 8×8 pan you might want to check it after 45 minutes with a toothpick.  If it comes out clean it’s done.  You can also lightly press on the top and if it’s done it should spring back.

UbeDzLm0TZuZyiyEGquI3g

In case you are interested here is the calorie breakdown for you:  If you make the bread as directed above with 2/3 cup sugar and 1/2 cup choc chips and 1/2 cup walnuts, and you cut it into 12 equal pieces, each piece would be about 190 calories and that is a decent sized slice.  If you lower the sugar by half:  ie. add just 1/3 cup, and omit the choc chips and nuts it comes down to 121 calories a slice!  Add a dollop or real whipped cream brings your treat up by 50-100 calories depending on how much you add.

Enjoy!!!

Falafel

Falafel

57076032050__3B5225C3-F7AC-4243-90FC-CF861DC40E15 
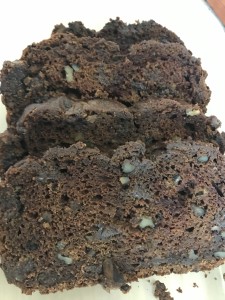
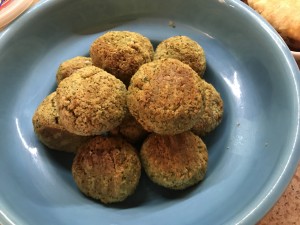
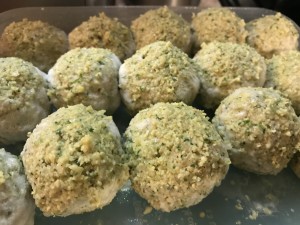
Falafels are originally an Egyptian food.  There are a variety of options for spices and cooking and I will offer both here.  I have never really been a big fan of falafel, but my kids love them and aside from the deep fried variety, they are a great source of protein if you are vegetarian and also are filling without being high in calories.  Of course once you deep fry them they become less healthy and need to be eaten in moderation.  I got an air fryer for Christmas and find they cook well in the air fryer, but are not as moist as the deep fried variety, so need to be served with a dip.

The trick to making them is to not use canned chickpeas.  Buy dried chickpeas and soak them overnight for the best results.  Spices used should be to your taste, and I have put below an optional cardamom addition, but we did find this flavor a bit overpowering so beware.

  • 1 cup dried chickpeas
  • 1 teaspoon salt
  • 1/8 teaspoon red pepper (optional)
  • 1/2 chopped onion
  • 4 tablespoons chopped parsley
  • 1 teaspoon corrianda
  • 1 teaspoon cumineaten with sauces of which there are a number that go very nicely
  • 1/2 teaspoon cardamom (optional)
  • 1/2 teaspoon black pepper
  • 2 tablespoon fresh cilantro leaves (optional)57076160319__BFF508EB-0662-4206-94A0-BE317A3FDAB1
  • 1 tablespoon flour
  • 1-2 cloves garlic

Directions:  After soaking chickpeas overnight, add all ingredients to a food processor and pulse until mixture is finely ground but not paste like.   Chickpeas will still be in tiny pieces.  Make mixture into small balls and at this point they can be refrigerated or frozen until you are ready to cook them.

A fried falafel of about 3.5oz is about 330 calories.  A baked falafel has less than 100 calories but since it is quite dry does require the addition of sauces which will, of course, add calories.

Suggested accompaniments:  guacamole, Tahini sauce, hummus.  I had mine with cottage cheese which tasted good.  I read that hot sauce is a favorite for those who like a spicier falafel.

To cook them, either shallow fry, deep fry, bake or air fry.  I air fried my first batch at 375 for 20 minutes.

Sprouting 101

Sprouting 101

Sprouting is easy and fun!  I love to eat sprouts as do my whole family, and usually have 3-4 types on the go.  Once you begin sprouting you will see how easy it really is.  With a little daily maintenance you will be enjoying delicious sprouts in just a few days.

Sprouts are probably of the most nutritious and vitamin packed foods you can eat.  If you are looking for a way to get the most amount of nutrition out of the least amount of food, this is your answer!  To see specifically which vitamins and minerals you find in which sprouts visit the SproutPeople website:  https://sproutpeople.org/growing-sprouts/sprout-nutrition/

When you eat vegetables you are eating only a small part of the whole plant, but when eating a sprout coming directly from a seed you are eating the entire plant!  Not only are you consuming many vitamins and minerals, but also all the good cancer-preventing, anti-inflammatory, blood-cleansing and immune boosting phytochemicals all packed into that small seed.  Plus you are going to be able to eat a bunch of them!

IMG_0883IMG_0853


First of all you need a sprouting jar (see picture).  Of course you can make yourown, just use some gauze and an elastic band over the mouth of the jar so you can rinse and drain your sprouts without losing any.  These jars that I use come with a metal mesh at the mouth as you see, which works really well.

Step 1. Buy your seeds.  I buy mine on amazon and make sure to get organic seeds.  For jar sprouting I like Mung beans, Alfalfa and Wheat berries which I make into Manna bread (see recipe: Home made sprouted manna bread)

Step 2.  Soak your seeds for 10 hours or overnight.  In one of these jars I usually use about 2 tablespoons of Alfalfa seeds, 1/2-3/4 cup of Mung beans and 3/4 cup of wheat berries.  You can fill the jar to about half full with water.

Step 3.  Drain seeds.  Pour out as much water as you can.  Tip jar on it’s side and put on a counter somewhere.

Step 4.  Rinsing.  You should rinse your seeds at least twice a day, three times if you think of it.  Fill the jar back up with water, and drain getting rid of as much water as you can.

Step 5.  Expose them to light so they can green up.  Perhaps you have them in a pretty light area on your counter top, but in case you don’t be sure that once they start to grow they have light.  That enables them to undergo photosynthesis and become green.  The chlorophyll incorporated by light exposure has multiple health benefits.  For more information on Chlorophyll and sprouting, visit the sprout people website:  https://sproutpeople.org/growing-sprouts/sprouting-basics/greening/

Step 6.  When are they ready?  Mung beans only take a couple of days, and once they have little white shoots coming out of them I put them in the refrigerator, in a closed container with folded paper towel at the bottom to ensure any excess moisture doesn’t spoil them.  Alfalfa may take a little longer, and once it’s almost filling the jar you can put it in the refrigerator in an airtight container.  The most important thing is to make sure the sprouts are completely dry before storing them.  You can let them drain 8-10 hours after the final rinse, or use a salad spinner to release any extra moisture.  If they go bad in the refrigerator quickly its because they were stored wet.

Interesting fact:  Alfalfa sprouts contain potassium, magnesium and calcium – a winning triad of electrolyte minerals that your body needs especially after working out, along with water and salt!  So make yourself one of my home made sports drinks, and grab a big chunk of alfalfa!  Or better yet, make yourself a green smoothie and add some alfalfa.

Home made sports drink

Home made sports drink

So when our bodies sweat, we lose sodium and potassium and water.  We need to replenish our bodies to ensure adequate recovery and also to avoid muscle cramps.  The commercial drinks are filled with sugar and synthetic vitamins which are hard for your body to absorb.  Coconut water is really natures sports drink containing natural electrolytes.  Adding coconut water to this drink which also contains sodium will help replenish your body and bring things back into balance to ensure proper muscle recovery, and help prevent muscle cramping.

  • 1-1.5 Tablespoon raw honey
  • 1 Tablespoon lemon juice
  • 1/2 Teaspoon sea salt
  • 1 Cup coconut water
  • 1 Cup water

Dissolve salt and honey in 1/2 cup boiling water.  Add lemon juice, coconut water and the rest of the water (preferably filtered).  Add ice cubes and drink after or during workout.