
Sprouting 101
Sprouting is easy and fun! I love to eat sprouts as do my whole family, and usually have 3-4 types on the go. Once you begin sprouting you will see how easy it really is. With a little daily maintenance you will be enjoying delicious sprouts in just a few days.
Sprouts are probably of the most nutritious and vitamin packed foods you can eat. If you are looking for a way to get the most amount of nutrition out of the least amount of food, this is your answer! To see specifically which vitamins and minerals you find in which sprouts visit the SproutPeople website: https://sproutpeople.org/growing-sprouts/sprout-nutrition/
When you eat vegetables you are eating only a small part of the whole plant, but when eating a sprout coming directly from a seed you are eating the entire plant! Not only are you consuming many vitamins and minerals, but also all the good cancer-preventing, anti-inflammatory, blood-cleansing and immune boosting phytochemicals all packed into that small seed. Plus you are going to be able to eat a bunch of them!
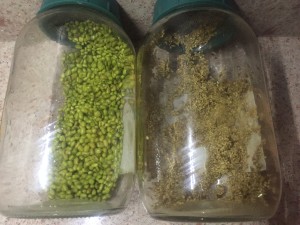
First of all you need a sprouting jar (see picture). Of course you can make yourown, just use some gauze and an elastic band over the mouth of the jar so you can rinse and drain your sprouts without losing any. These jars that I use come with a metal mesh at the mouth as you see, which works really well.
Step 1. Buy your seeds. I buy mine on amazon and make sure to get organic seeds. For jar sprouting I like Mung beans, Alfalfa and Wheat berries which I make into Manna bread (see recipe: Home made sprouted manna bread)
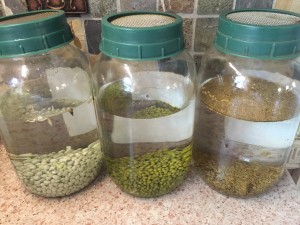
Step 2. Soak your seeds for 10 hours or overnight. In one of these jars I usually use about 2 tablespoons of Alfalfa seeds, 1/2-3/4 cup of Mung beans and 3/4 cup of wheat berries. You can fill the jar to about half full with water.
Step 3. Drain seeds. Pour out as much water as you can. Tip jar on it’s side and put on a counter somewhere.
Step 4. Rinsing. You should rinse your seeds at least twice a day, three times if you think of it. Fill the jar back up with water, and drain getting rid of as much water as you can.
Step 5. Expose them to light so they can green up. Perhaps you have them in a pretty light area on your counter top, but in case you don’t be sure that once they start to grow they have light. That enables them to undergo photosynthesis and become green. The chlorophyll incorporated by light exposure has multiple health benefits. For more information on Chlorophyll and sprouting, visit the sprout people website: https://sproutpeople.org/growing-sprouts/sprouting-basics/greening/
Step 6. When are they ready? Mung beans only take a couple of days, and once they have little white shoots coming out of them I put them in the refrigerator, in a closed container with folded paper towel at the bottom to ensure any excess moisture doesn’t spoil them. Alfalfa may take a little longer, and once it’s almost filling the jar you can put it in the refrigerator in an airtight container. The most important thing is to make sure the sprouts are completely dry before storing them. You can let them drain 8-10 hours after the final rinse, or use a salad spinner to release any extra moisture. If they go bad in the refrigerator quickly its because they were stored wet.
Interesting fact: Alfalfa sprouts contain potassium, magnesium and calcium – a winning triad of electrolyte minerals that your body needs especially after working out, along with water and salt! So make yourself one of my home made sports drinks, and grab a big chunk of alfalfa! Or better yet, make yourself a green smoothie and add some alfalfa.